Introduction I am by no means a fashion expert. Having gone to a school with a uniform until university, I am still slowly defining any "personal style," finding out what works for my body type/colouring, and building up a solid wardrobe. Lately, I noticed I had a significant lack of cozy clothes that are a) comfortable enough to lounge around in, b) appropriate enough to go out and look cute in, and c) warm enough for Montreal's below-freezing weather. 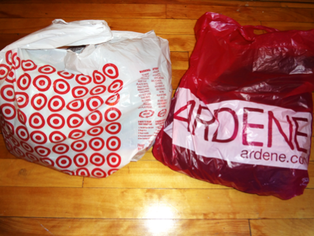 Unless you're living under a rock, you're aware that it was Black Friday and Cyber Monday last weekend, which has sort of extended into a whole cluster mess of sales, bundles and discounts leading into December's holiday shopping season. Although some of the individual sales were super duper tempting, the gross amount of discounts advertised sort of overwhelmed me away from the whole experience. However, I did somehow make my way into Ardene and Target over last week, and took advantage of their reduced prices (not that they were all that high to begin with). Over the past week, I've barely worn anything else besides these clothes as they make the perfect spend hours "studying" at a cafe while secretly trying to justify visiting the Bay later as a reward for all your "hard work."
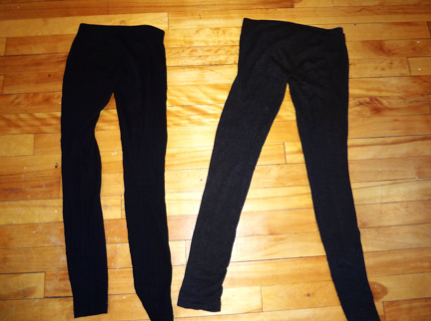
1. Ardene Ardene is a Canadian-only company, somewhat reminiscent of Claire's accessories and atmosphere. However, they have also recently increased their clothing selection significantly, with tons of low-priced sweaters, leggings, jeans, dresses, and even onesies! Based on its brand's image, most women above the age of fourteen tend to write-off Ardene as being cheap or tacky. While the clothing is definitely not high quality (they have more of the Forever21 vibe), at least the pricing reflects that! There's no worse feeling than actually spending significant amount of $$$, only to find out that the clothing purchased also breaks down after a couple of washes (aka they're made out of the same shitty material, and it's not like cashmere and silk are really in my current clothing budget).
My one gripe with Ardene is that shopping there is reminiscent of when my mom used to quiz us kids on our math skills on our way to/from school (this actually happened frequently in my childhood). When you walk into the stores, which at least aren't as large and disorganized as Forever21, you're swarmed by pink labels indicating the price bundles: "3 for $10," "3 for $15," "2 for $15," "2 for $20"...you get the idea. But I digress, because most of the bundles are pretty good deals.
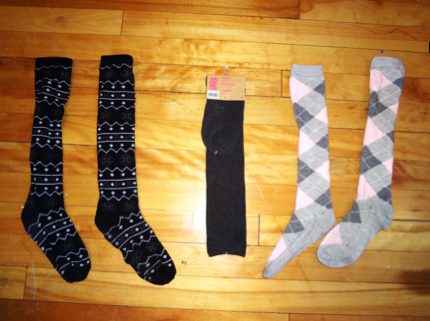
See those fun festive "midi socks"? All three of those pairs cost me a combined total of $10 CAD (individually they're 5.50, so it's legitimately cheaper to buy three pairs instead of two...screw logic). When these pictures were taken, I had yet to wear the regular black pair, so you can see how they came packaged. Since I have gotten these, I have worn one of the pairs every single day. Not only do they keep my feet nice and warm by trapping them in with my pants, they're also adorable paired with any leggings, especially when you see them peeking out of boots. Also, I think these are wonderfully versatile since they can be worn with with skirts, shorts and dresses in the spring/summer for a little preppy vibe.
I had my first final exam yesterday morning for Organizational Policy, a strategy class that I (actually) thoroughly enjoyed. Even though I got barely any sleep the night before, I woke up in a practically euphoric state, and just had a great mindset all day. I do take my education very seriously (and should given that my parents are paying for it), but sometimes university students, especially us McGilligans, can get way too caught up in academic stresses. Don't get me wrong, I do believe in the value of studying hard, regardless of how awful my actual work ethic may be. However, in the grand scheme of things, exams are just tests and grade point averages are just arbitrary numbers (neither being perfect representations of what you actually have learned). I guess what I'm saying is: try hard at school, but don't let it consume you. Life is still short, and a good attitude and positive mindset can change everything!
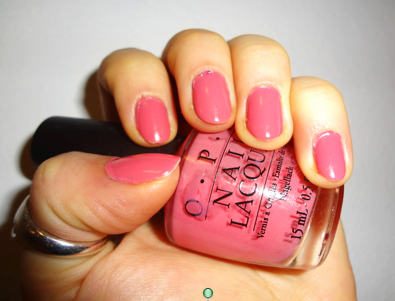
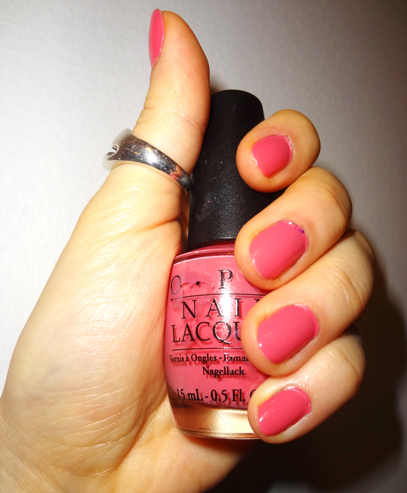
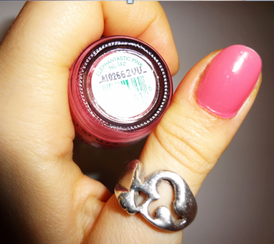 Okay life advice over. The reason behind that cheesy prelude was to explain why I did my nails right before finals started: because having them done makes me feel happy (and happy people just don't shoot their husbands) and more generally prepared to carpe the diems. Unfortunately, I didn't take any pictures of my nails all freshly painted, so keep in mind that this level of chipping is very minimal and impressive for three days wear n' tear. This lasting power may be due (at least in part) to my nail care routine, which I detailed quite extensively here. However, I have found that each polish's lasting power is unique to that colour, and can't be assumed based on its brand (Essie vs. OPI vs. Revlon etc.). To that extent, here is solid, photographic evidence of how OPI's Elephantastic Pink polish has lasted thus far.
Elephantastic Pink by OPI is a bright, unique Barbie pink that is definitely under-used in my ridiculously large nail polish collection. I can honestly say that I do not have any colours similar to this shade, though I do own about five identical baby pinks a la Essie's Figi (guilty). Also, look how well it has lasted after the past three days! Granted, I've barely done any dishes this past week (....exams) and that is usually my nail polish's worst enemy. Nevertheless, Elephantastic Pink may be a somewhat unconventional choice for this time of year, but it has certainly matched my recent sunny disposition. Goal: I need to make an effort to give this polish the attention is deserves.
I hope everyone has been keeping happy and healthy this winter season. Try to find a bit of time in any busy schedule (or long study marathons) for the little things that keep you happy, whether or not this is a fresh manicure :)
Okay, so I know this is kind of bitchy because this beauty has been off the Sephora website for quite a while. BUT I have justified posting up this late review because: - It is still available in some Sephora stores! (I go always and can attest to this fact)
- Sephora recently sent out $15/$20 off when you spend $50 coupon codes to their VIBs and
- These coupon codes aren't even valid for Canada online (oh fine print), so you'll have to go to the store to use it anyway
- Some of the blushes in this palette are sold individually as well. If you happen to love just one, you could still pick it up individually (I would recommend you do this with the coupon code though)
- If you must have this in your life and cannot live without it, then (I judge you) it is being sold at inflated prices on eBay so...yay? (It's still probably worth it in my opinion)
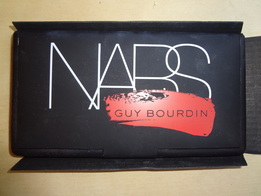
Note: This palette was a Sephora exclusive so sadly it is not available other places that NARS is sold. But, there were other great palettes/sets in this collection, even some that were never at Sephora, that are still available at Holt Renfrew and the Bay (Again, I go always so trust me). And so without further ado, I present my beloved NARS One Night Stand palette from their recent Guy Bourdin collaboration: Introduction 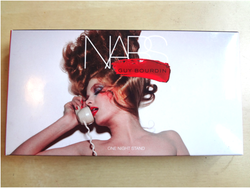 So last month, Sephora was all about the sales, starting with the Friends and Family Sale and quickly followed by the VIB sale, both at 20% off. Before I knew about the VIB sale, I was lucky enough to get a F&F coupon from Nikki Roth (from NikkiRothBeauty), who works at Sephora and makes awesome YouTube videos, so thank you Nikki! I debated long and hard about what to get and tried to keep it reasonable at one palette only. I was initially sold on the Hourglass Ambient Lighting Palette, since those powders got super hyped-up last year (although every time I try them in store I'm honestly unimpressed), and here was an opportunity to try out three shades!
 However, when I looked into the nitty gritty, I realized that the Ambient Lighting Palette was too good to be true. You were actually getting less product total (3.48oz vs. 0.35, so fine they're like the same) for $15 CAD more!? ($67 CAD vs. $52 CAD; in the U.S. it was $58 vs. $45). Yes, it was an opportunity to try three colours (and one was limited edition, blah blah blah) but realistically, the only shade I cared about was Dim Light and the overall palette was a worse deal in $/gram of product, so that was a no brainer. I also considered the Laura Mercier Artist's Palette for Eyes, but most of the shades are fairly dupable and it had a bit too much purple (and no other colour family or warmth) for my liking. Also, I don't exactly have a shortage of eyeshadow palettes in my life. Note: If I still haven't convinced you, both of these palettes are also sold out at Sephora online, though still available in some stores and elsewhere, but I would go grab them now before it's too late (seriously, leave. You can read this later).
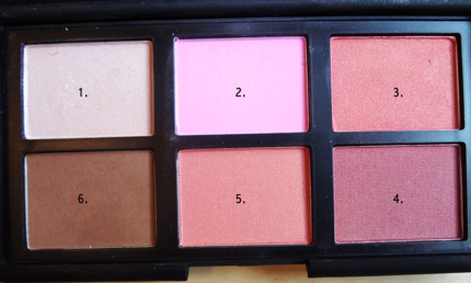
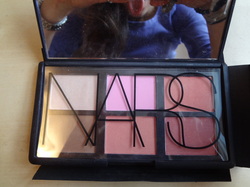 So this is what came with the NARS One Night Stand Palette, no silly, flimsy brushes or primers, just six beautiful cheek colours. Yes, this palette was ridiculously expensive at $72 CAD less 20% (about $57.6 CAD in case you were wondering). However, compared to the Hourglass palette, I actually felt I was getting a good value for the dollar: this palette contains 0.84oz (6*0.14oz) of product - each full-sized NARS blush is 0.16oz ($32 CAD), while a bronzer is 0.28oz ($42 CAD). Essentially, for the price of one bronzer plus one blush, you're getting four blusher shades in a variety of colours/finishes, the famous Laguna bronzer and a wonderful highlighter.
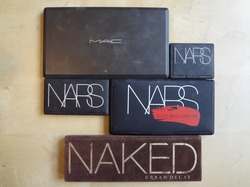 Furthermore, I actually didn't own that many blushes, by some standards. Unfortunately, this palette did contain their famous Orgasm blush, which I did already own. However, I was sort of expecting this, given Orgasm is practically the most famous blush of all time and so they put it in almost every palette and set ever made. And let's be honest, can I girl ever have too much Orgasm in her life? (I kid, I kid). So since I had always wanted to try more NARS blushes (and Laguna), but could never decisively pick one given their high price point, One Night Stand was easily justified. For size references, you can see it compared to some of my other palettes from clockwise: MAC 16-pan eyeshadow palette, NARS Orgasm Blush, NARS One Night Stand, Urban Decay Naked eyeshadow palette, and NARS And God Created the Woman eyeshadow palette. One Night Stand features your standard black rubber NARS packaging, and a nice beautiful mirror (which you can see me in above). While some complain that this packaging attracts dust and smudges (which it does), I happen to love the NARS packaging since it is sturdy, sleek, easy to open yet firm when closed, and I also kind of love when it starts to look worn in and dirty over time.
Colour Descriptions - Devotee (Highlighter): A beautiful frosted highlighting powder that is not-too-pink nor not-too-gold, but somewhere in between as a neutral pinky beige. I do not have many highlighters to compare this to, but it does add a beautiful finish to my skin tone that is not too obvious, but definitely noticeable. Note: Devotee does have lots of fine glitter particles, which may be bothersome to some (can accentuate pores) - use sparingly on cheeks and you should be fine.
- Mistinguette: Honestly, this is the shade that sold me on this palette. I have been holding off on Bobbi Brown's Pale Pink and MAC's Well Dressed, which have both been on my wishlist for quite some time, so I was thrilled when I saw a bright, blue-based (cool-toned) matte pink was included. These sorts of shades may be intimidating to some, but please give them a chance if you have a light/medium skin tone, since they just show up beautifully on the skin. So far, I've used Minstinguette more than any other shade in the palette, since it is perfect for achieving a flushed look.
- Orgasm: Like I really don't feel that I need to say anything about Orgasm. (It's a pinky-coral with some golden shimmer that is supposed to be universally flattering). Though I have heard many say it is not worth the hype, it was the first blush I ever got (because duh) and I love it. Whenever I have a special event, Prom and the like, I have always worn Orgasm (though now with my larger collection this may be subject to chance).
- Goulue: Okay first off, what the hell sort of name is this? Being fluent in french, I am rarely stumped my cosmetic and fashion names that are hard to pronounce, but this one is a little tricky (Ps. I've looked it up and "Goulue" was the nickname of a famous French CanCan dancer, go figure). Anyway, I was also super excited about this berry red/pink shade, since it is a perfect fall/holiday colour to brighten up my pale skin. Obviously, Goulue has the best colour payoff, so I would use a light hand and blend it out to avoid a clown-face. Nevertheless, it provides a surprisingly natural finish, even with its golden sheen. Goulue would also be perfect for medium-darker skin tones, just saying.
- Deep Throat: I have been interested in this shade ever since Allison/Amarixe started raving about it years ago (and unlike me, this chick knows her blushes). I haven't actually used this shade much, but I have played around a bit and found it to be the perfect, understated cheek to pair with any eye look. Slightly lighter and more coral than Orgasm, I think Deep Throat is a great versatile go-to for light-medium skin tones, that will enhance your complexion without drawing any attention away from a dramatic eye/lip.
- Laguna (Bronzer): Almost as famous as Orgasm, this bronzer needs no introduction. Laguna is perfect for the whole "warm up your entire face" look, and can be built-up for a little contour if you really want it to, though keep in mind it has a subtle golden shimmer. On my skin tone, Laguna is not too orange-y, nor is it really dark enough to achieve a dramatic contour (for that, I prefer Benefit's Hoola Bronzer). Although I really Laguna and have considered buying it a couple of times in the past, my one gripe with One Night Stand is that the Laguna pan is just a little too small for my Sigma F25 brush, which I happen to use for bronzer. However, it's still a wonderful shade for light-medium skin tones, though probably too light for darker skin tones.
Note: Orgasm, Deep Throat, and Laguna are permanent, though they are often included in NARS palettes, so you may want to hold off on purchasing for later collections. Devotee, Mintinguette, and Goulue are all limited edition, though Albatross, Gaiety and Dolce Vita from their permanent range would make fine substitutes (respectively).
First of all, happy December! December is one of my favourite months for several reasons, most notably the infectious holiday spirit, giving gifts, the family times, the pretty snowfalls, and welcoming a new year. Also, today was officially the last day of classes at McGill so TIME TO CELEBRATE (oh wait, finals, oops....I mean, time to buckle down and study hard). And in that spirit, it is the perfect time to get back in the classroom for Megan’s Guide to the weird world of talking about beauty products on the Internet and other related inquiries. If you happened to miss Lesson #1: Vocabulary, then you should definitely click here to catch up and get your read on. The end of November marks the new hordes of routine monthly favorites/empties videos and blog posts, and the beginning of December also marks the start of Vlogmas for many. Confused as to what monthly "favorites," "empties," or "Vlogmas" may signify? Then grab your notebooks and highlighters, class is about to commence. Lesson #2: Traditional types of videos/blog posts There are no specific rules or restrictions for the topics of beauty-related videos and blogs, but there are a several generic types of videos/posts that are most shared and loved by the beauty community. Knowing what these traditional types are can be very useful when trying to sort through the multitude of beauty information in this great world wide web. - (Monthly) Favorites: Showcasing beauty products that have been most-loved that past month, or simply recently. Some people solely discuss beauty products and fashion items, while someone include other types of favorites, such as food, music, movies, books, people, etc. (note: some ambitious vloggers make a “beauty favorites” and separate “non-beauty favorites” for lifestyle choices)
- Haul: Sharing recent shopping purchases, sometimes as they are actually being taken out of shopping bags and sometimes including some initial reviews.
- (Monthly) Empties: Essentially, this is when someone shares their recycling/garbage of the products they have finished that past month (or recently), provides a more in-depth review, and shares whether or not they would repurchase each product.
- TAG Videos: These videos/posts vary widely in topics, often containing random questions, weird challenges that may involve makeup and/or significant others and/or family members. The way that TAG videos and posts work is that once someone invents the theme, they pass it on by “tagging” other members of the beauty community to make the video/write the post, and then those people tag more people, etc. This explains why you might see millions of videos entitled: “Sweater Weather TAGs,” “My boyfriend does my makeup TAG,” “Five Minute Makeup Challenge,” “Perfect Palette TAG,” etc.
- Skincare Routine: This one is pretty self-explanatory. Sometimes divided into morning vs. nighttime skincare routines, but essentially an overview of the various skincare products that one uses. Keep in mind, it is far more risky to experiment with skincare based on others' recommendations when compared to makeup. Skincare products can react very differently depending on skin types, climates and age, and what works well for someone may not work as well for you. That being said, it never hurts to know what other people are actually using and the results they've seen!
- Review: Probably the most common type of blog post consisting of someone's opinion regarding their experience with a beauty product. Reviews can (and ideally) include swatches, comparisons, pictures (if in blog post format), detailed information and whether or not the reviewer recommends the product and for whom.
- Tutorial: This is another very common type of beauty video, and sort of responsible for the YouTube beauty community revolution. Tutorials provide a detailed guide of how someone applies a specific makeup look, in order for you to recreate a similar look or simply learn from their application techniques. Some tutorials are specific to eye makeup or face base makeup, while some can show a complete transformation from no makeup to a complete full-face. Tutorials are great for beauty newcomers and experts alike, as you can always learn something new from others or get inspired by their creativity and combinations.
- How-To: Whilst similar to tutorials, how-tos tend to be far more detailed to a specific makeup technique, and as such are excellent sources of knowledge. Some examples include how-to: contour, shape/groom eyebrows, apply self-tanner, get that perfect cat-eye eyeliner, make your lips appear fuller, cover up hyper-pigmentation and acne scars....the possibilities are endless!
- Unboxing: A couple of years ago, monthly subscription services took over the online beauty community. While some beauty "gurus" have partnerships with these services and receive their subscriptions free from PR in order to showcase the boxes to their viewers, these videos are still a good resource if you are curious as to what a typical monthly box from one of these subscriptions would look like, and if it would be worth your while.
- First impressions: Feature initial reviews of a beauty product, usually during/after one's first application of it. Although these are not the most comprehensive of review-type posts, they can still be useful, especially if you are considering a brand new product, since many first-impressions are for products that have yet to be released (some of the online beauty community content providers get products prior to their release, once again for PR purposes, as a means of sharing them with their audiences).
- Room Tour / Aparmtent Tour: A lifestyle video that is still very heavily requested/loved in the beauty world, since those who appreciate learning aesthetics in makeup often enjoy seeing others' interior decor.
As much as I feel fully comfortable going about my day without a trace of makeup on, or with my hair all in a mess, I must confess that I feel naked without any nail polish on. Summer 2010 was when I discovered my love for doing my nails, with the help of OPI Russian Navy (stolen from Debs) and OPI Got the Blues for Red (first one I owned). Soon afterword, OPI released their amazing Fall 2010 Swiss Collection, which completely won me over with its stunning cream and shimmer shades: Just a Little Rösti at This, Diva of Geneva, Lucerne-tainly Look Marvelous, and Ski Teal we Drop were my picks.
Since I started buying hordes of nail polishes with each season's collections, it was inevitable that I eventually perfected my own manicure routine, with some great tool/method discoveries along the way. Wednesday marked the first night of Hanukkah, a Jewish holiday, otherwise known as the Festival of Lights. Hanukkah commemorates the story of the Maccabee army, a small band of Jews that managed to beat the mighty Greeks. A great miracle occurred when the Maccabee's only had enough oil to burn for one night, but it managed to last eight nights! On Hanukkah, we Jews celebrate this miracle by lighting candles for eight straight nights, giving presents, and consuming mass amounts of food with our loved ones. Since I wasn't able to spend the holidays at home with the family (though we did FaceTime our first candle lighting, don't worry), I decided to unleash some festive spirit the best way possible: Hanukkah. Themed. Nails. I also documented my detailed step-by-step manicure routine, including my holy grail nail care products, and tons of tops for beginners that I have learnt over the years:
 1. Choosing your Shade
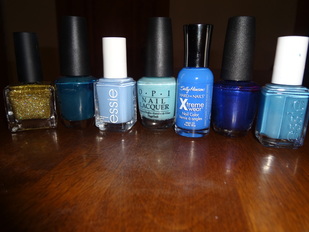
Sadly, I have a complex process for picking my nail polish colour. First, I usually decide on a colour family (purples, reds, darks, pastels) and texture (cream, shimmer, glitter, etc.). Since I was following a Hanukkah theme, I knew I wanted to use a blue cream and a gold glitter, and narrowed it down to the ones you see here. From Left to Right: Urban Outfitter's Gold Glitter, OPI Ski Teal we Drop, Essie Bikini so Teeny, OPI What's with the Cattitude?, Sally Hansen Pacific Clue, OPI Tomorrow Never Dies, and Essie Coat Azure. Sadly, these are not the only blues, nor the only gold glitter, that I have in my collection. I always have difficulty making a final decision on my own, and usually end up asking my mother (or boyfriend) to make the decision for me. Debs (mom) ended up choosing Ski Teal we Drop by OPI (second polish from the left) , to pair with the Urban Outfitter's Gold Glitter for my accent nails (yes, I know accent nails are so 2011, but I'm still not over them).
 2. Prepping for Polish
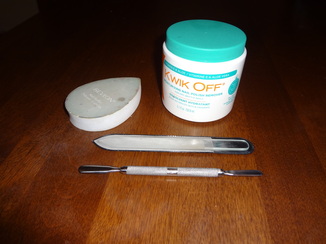
In my opinion, the work you do to prep your nails before applying polish is equally (if not more) important than the actual nail polish application itself. Naturally, you should always start with clean, unpolished nails. For someone like me, I usually go straight from one nail polish colour to the next, and need to start my manicure by actually removing whatever I had on my nails previously. Personally, once I discovered these polish-removing tubs, equipped with sponges for convenience, I have yet to go back to the traditional liquid + cotton pad combination. This tub is the Kwik Off Moisturizing Nail Polish Remover by Sally Hansen, though any similar product will suffice; I usually just buy whatever is cheapest when I run out. After removing all traces of colour, I file each nail individually. Now listen, if you will take anything away from this blog post, let it be this: YOU NEED A GLASS NAIL FILE IN YOUR LIFE. I fully credit the discovery of this holy grail product to my mother (Debs), who has used the same glass nail file for as long as I can remember. Yes, these nail files are (and should) be more expensive than your traditional, run-of-the-mill sticker-on-cardboard nail files. However, these babies are made to last, if you invest in a good-quality one. I honestly do not know where this is from, as my mother bought it for me four years ago AND I AM STILL USING IT WEEKLY (but I would check your local beauty/nail supply shop). If you want to do your manicure quickly and efficiently, then a glass nail file is your new best friend. You're welcome.
 I have also recently began pushing back my cuticles, once again by Debs' recommendation (insistence), and use a dual-ended metal contraption in order to do so. Although I don't notice a huge difference when I push my cuticles back (#yourcuticleslooksexypushedback), it takes only a mere couple of minutes to do so. The main element I miss from getting real manicures done is when they would cut off all of my dead cuticle skin, since it prevented me from picking at it (close second: the hand massage). Pushing the cuticles back sort of does the same trick. The last step involves using the teardrop-shaped Revlon crazyshine Nail Buffer. There are several similar buffer products (some even come equipped with a file, but it doesn't hold a candle to my glass one) on the market, though I have enjoyed this one for quite some time now. First, you use the buffer side to smooth the surface of your nails, and finish with the crazyshine side, which leaves your nails rather shiny. If you're the type of person who frequently leaves your nails bare, then I would highly recommend picking one of these buffers up at the drugstore. Once all of these steps are complete, my nails tend to look like what you see in the picture above. Yes, there is some minor yellowish discoloration on my nails. BUT, the camera made them look a lot more yellow than they do in real life. For someone who always has nail polish on, my nails are in pretty good health, thank you very much.
A mere couple of years ago, I had never applied so much as mascara, and some occasional concealer on my teenage acne. Right before my seventeenth birthday, during my senior year of high school, my family took a relaxing beach trip to Jamaica. Unfortunately, while the resort was wonderful and Jamaica is amazing, it rained for the majority of our stay. After devouring the only novels I had brought, I ended up reading several beauty/fashion magazines cover-to-cover to pass the time. Somehow during that week, a love of beauty and makeup was born. Since I can have a rather obsessive personality, it didn’t take me long to find the online beauty community, both blogs and YouTube videos. Nowadays, several peoples’ livelihoods are being made by sharing their passion for cosmetics on the Internet, which means there is a whole lot of content added daily! Through reading several blog posts and watching tons of YouTube videos, I have learnt a whole lot about a whole lot pertaining to these beauty themes (makeup, skin care, body care, fashion, etc.) and my thirst for knowledge has only grown over the years.
Many people do not understand how/why I devote so much of my free time to learning about beauty, and I don’t expect them to, nor do I try and justify it (because I honestly don't know the answer myself). However, I know a lot of people who have turned to the online beauty community, either to search for specific information (a product review, a particular tutorial, etc.) or out of general interest, but have become overwhelmed and discouraged by the confusing terminology and customs that the virtual community assumes is general knowledge. I know that I would have greatly appreciated some sort of guidebook/dictionary/FAQ to help me out along the way, so that is precisely what I have chosen to write. Without further ado, I present: Megan’s Guide to the weird world of talking about beauty products on the Internet and other related inquiries. Unfortunately, if I tried to cram all of the weird aspects of the online beauty community in one blog post, it would still be very overwhelming. Therefore, I have decided to divide my guide into a three-part series, and today I present Lesson #1 - Vocabulary
GLOSSARY: the most commonly used terms/abbreviations/acronyms of the virtual beauty world
- OOTD: “Outfit of the Day” - the clothes I wore today and where I bought them from
- FOTD: “Face of the Day” - the makeup I wore today (and sometimes how I applied it)
- NOTD: “Nails of the Day” - the nail polish I had on today
- MLBB: “My lips but better” - refers to a lipstick whose color is very similar to the natural lip shade that you possess
- HG: “Holy Grail” - a beauty product that cannot be lived without (or that you would really rather not live without)
- VIB: “Very Important Beauty Insider” - a Sephora acronym/title that you can receive when you sign up for a membership account with the company
- VIB Rouge: special Sephora membership status attained once you spend a certain amount annually on products (next step after having a VIB account and you get some added benefits)
- Cult product: a product that has a significant cult following of fans and is usually well-known to most of the beauty community, such as NARS Orgasm blush (though many people awkwardly do not like this) and Urban Decay Naked Palettes, which reminds me…
- Naked Palettes: Eyeshadow palettes by the brand Urban Decay that contain twelve full-sized neutral colors. These palettes are extremely popular, and Urban Decay has just released their third “Naked 3” version for this holiday season
- GRWM: “Get Ready With Me” - usually in the form of a video that takes the viewer on a journey of someone getting ready for the day or night out (clothing and/or makeup and/or body care)
- Swatches: what a makeup product looks like swiped on skin’s surface, usually on one’s hand or more likely on the inside of one’s arm (this is to show you a more accurate representation of how a product looks, since it often varies from how it looks in its packaging)
- Haul: to haul (verb) essentially means to buy; a haul (noun) refers to a shopping trip
- Dupe: a substitute of a cosmetic product that provides an identical effect to another; often used to showcase a cheaper drugstore alternative that can be used in place of a higher-end product
- “Creasing”: Our skin happens to actually have tons of little wrinkles and crevices, no matter what age you are. Creasing occurs when a product settles/clumps into the natural creases of your skin, which most usually occurs under your eyes (with concealer) and in the fold of your eyelid (with eyeshadow)
- DIY: “Do it Yourself” - an easier/cheaper way to substitute the benefits or effects of using a beauty product, often with household ingredients or items (this is an acronym that you probably should know already)
- “Hitting Pan”: when you have used so much of a product that you have hit the backing (or actual metallic pan, for powder products) of its packaging, which can feel like quite the accomplishment (you go Glen Coco)
- Beauty "Guru": When girls started making videos about makeup on YouTube, the only classification for their YouTube channels that made any sense was "guru," and thus many beauty vloggers/bloggers still follow the title of "beauty guru"
- High Street: British term that technically refers to the concept of the primary business street of a town/city. In beauty terms, this usually refers to what North American's refer to as "drugstores," or where you can buy cheaper makeup and cosmetic brands
Well class, that’s all the time we have left for today's lesson (since it’s almost 3:00am and I have actual class tomorrow, oops). Remember that Megan’s Guide to the weird world of talking about beauty products on the Internet and other related inquiries is only intended to serve as a helpful resource, and that these are not actual dictionary-defined terms.Thank you for your attendance and attention in today’s lesson, and I’ll see you next time for Lesson #2: Traditional and Routine Topics.
One of the many benefits of attending a large university (McGill) in a major metropolis (Montreal) is that there are a variety of opportunities to get involved and to take advantage of. This past weekend, I was lucky enough to glimpse the inner workings of CBC Montreal, by none other than the seasoned anchor Debra Arbec, who currently hosts CBC News: Montreal at 5:00pm, 5:30pm and 6:00pm from Monday to Friday.
As someone who has always had a passion for television and broadcasting, this experience was truly invaluable. Yes, I have been on the NBC studios tour in New York City (which was a blast and a half), and I have also been to CBC studios in Toronto several times to dance for the Easter Seals Telethon. However, the opportunity to spend over an hour with an actual anchor answering all of my (many) inquiries made me learn a whole lot about a career in news broadcasting and journalism. Not only was Mrs. Arbec extremely friendly and relatable by providing us with tons of insight and personal stories, but she also made a great effort to introduce us students to any member of the CBC Montreal team we encountered throughout the tour, which included her co-anchor Andrew Chang, reporters, producers, interns, writers and directors. Every single employee that we met was more than willing to answer our questions and offer advice. Additionally, I was able to learn the distinctions in job responsibilities across all of these different positions, and how they are increasingly becoming blurred as CBC employees are expected to be more and more cross-functional. Below is a slideshow of some of the pictures both taken by me, and by the McGill Women in Leadership club, who graciously organized the tour:
I once again want to thank the McGill Woman in Leadership club for organizing this event. In fact, the tour was originally supposed to be limited to fifteen students, and I was shocked that there were only a total of eight of us in attendance. I want to encourage any students reading this to stop immediately deleting all of your University emails, or walking by every bulletin board poster without so much as a glance. I know that we all get very busy, and that it can be hard to filter through all of the information being thrown at us constantly (considering a lot of it may have no relevance to your life), BUT you may just be missing out on some wonderful, unique opportunities!
So for anyone interested in a career in broadcast journalism, or who may just be interested in learning about the industry, I can share some of the insider anecdotes and tour highlights from Mrs. Arbec and her crew at CBC:
It finally happened. This week, my iPhone 5S was delivered...and the rest is history. I must confess, I was not eagerly anticipating this arrival in the same way that I await something like a Sephora delivery. I naively believed that I wouldn't even enjoy having an iPhone. "But I like having a full keyboard," I had said when my mother first propositioned a complete family-transfer to iPhone 5Ss. Which I must say, is still the main downside to my iPhone. It is true, after only ever having a Blackberry phone with a full QWERTY keyboard (I got a cellphone later than most and so went straight to the first Blackberry curve in red), I had become fully accustomed to such a luxury. However, I must say that I so so underestimated how much I would love this device. Some initial highlights include (but are not limited to): - Aesthetics: The iPhone 5S, especially the gold and white model I waited so patiently for, is undoubtedly sexy. Its the Porsche of smartphones! (correction: RIM's new Blackberry Porsche is probably the Porsche of smartphones, so the iPhone can be the Ferrari of smartphones).
- FaceTime: Yes, I know that virtual communication is not a true replacement for face-to-face contact, since the majority of communication is non-verbal (thanks, organizational behavior class). However, there are many important people in my life, such as my immediate family, who I do not have the opportunity of living in the same city with. Being able to have actual video conferences easily on a cellular device is so futuristic and cool like I don't understand how people aren't more amazed by this feature. The Jetsons lifestyle is slowly becoming our reality! (Obvious stipend: you can only FaceTime with other iPhone users, but fortunately my whole family has made the switch together).
- The music: Sometimes we forget that it was the iPod that started it all again for Apple, not phones or computers. After not having a functioning iPod for a while, I didn't realize how much I would appreciate having all my music on the go. Suddenly, I'm reverting back to my eighth-grade self, trying to collect all my music into iTunes, but oh how I miss the days of LimeWire. Also, is it just me or does shuffle finally play songs that I'm actually in the mood for? Like, it somehow got a much better intuition or something (though I could be imagining this, obviously).
- Network Effects: One of the first concepts I learnt in my business degree was that of Network Effects. In short, network effects describes the phenomenon wherein a good/service becomes increasingly valuable with each additional user that adopts it. In other words, the fact that most of my peers, friends and family have transitioned to iPhones makes mine even better because of all of the added applications available solely to iPhone users (FaceTime, Snap Chat, Instagram, etc.).
- The App Store: those network effects have a secondary function in that they encourage software developers to make applications compatible with the iOS platform. The amount of Apps (and especially free apps, which are the only ones I have tried thus far) in the App Store is astounding, and growing every day. I never realized how fun/useful/creative a lot of these apps could be, and just how varied their functions are. As such, I plan on doing a "my favourite apps" post in the future, once I've explored them a bit further.
- The microphone - text transposing feature: Instead of typing text, you can press a little icon that allows you to speak your text into the microphone, and then converts your speech into text on your phone. Obviously, this is not one hundred percent accurate, but I have found it shockingly more effective than I had anticipated.
- The thumbprint security feature: Again, not perfect, and definitely not necessary, but just so cool.
- Accessories: Given the network effects phenomenon, phone accessory makers are also increasingly motivated to make products compatible with the iPhones. Phone cases and accessories have become legit fashion statements, with several fashion designers now including iPhone cases in their collections (a girl can dream). However, Debs has insisted that the whole family wait until the new Otterbox Waterproof Preserver series become available (I'm on the email notification list, don't worry). This is understandable given that a couple of us have lost some phones to water damage, and I honestly don't care how bulky it may look, as long as it actually works. Until it becomes available, I opted for a clear screen protector and a vintage cassette style silicone case to prevent any scratching or damages (see gallery above).
- The new headphones: these are awesome, and a drastic improvement on the classic iPod headphones I have used in the past. The little silver speaker silver netting does not touch your ear, and the headphones are shaped to actually stay in your ears. The best part? There's a small attachment that controls your volume AND acts as a microphone so you can talk on the phone using your headphones, while the phone is in your pocket/purse.
- The camera: I remember the days when I five megapixel (MP) digital camera was difficult to fathom, yet here I am with 8MP, panoramic capabilities, autofocus, and many other fancy features better outlined here. I have never been one for taking lots of pictures, and every time I look back at old family photo albums, I wish that weren't the case. With the iPhone 5S, I have already found myself remembering to capture specific moments whose memories I want to preserve.
- Siri: Okay, so she's not perfect either. But we must admit, Siri is pretty unreal. The fact that there is realistically a little robot living within my iPhone who calls me "Your Majesty" (because I asked her to, duh) and answers all of my stupid questions (and yes, there are such a thing as stupid questions) is pretty f!*#king unreal.
The cons of the iPhone 5S? Easy, (1) the lack of keyboard and (2) the short battery life. As of now, that's really all I can complain about. As a sort of disclaimer, I realize how spoilt I am to have received this device for my birthday/Hanukkah present, but I am doing my best to make sure I use the most of her and keep her safe. Regardless of which phone/smartphone you may own, can we just take a moment to drop our jaws at modern technological advancements? Nowadays, with schools having every student use an iPad, we have all grown accustomed to having such advanced means of communication that we are unaffected by their sheer awesomeness. So whether you have an iPhone, another smartphone, a laptop, or any tablet, appreciate these crazy robots. And then go for a walk and experience a bit of nature, or have some actual human interaction (just sayin').
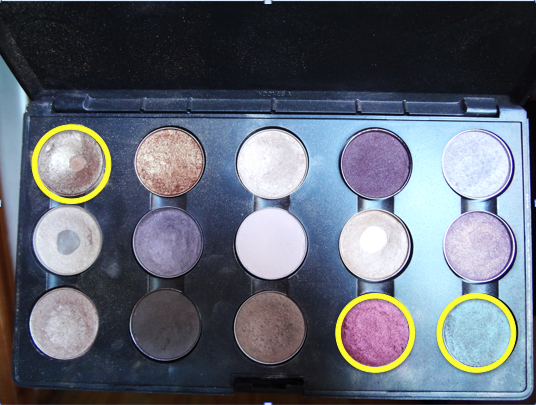
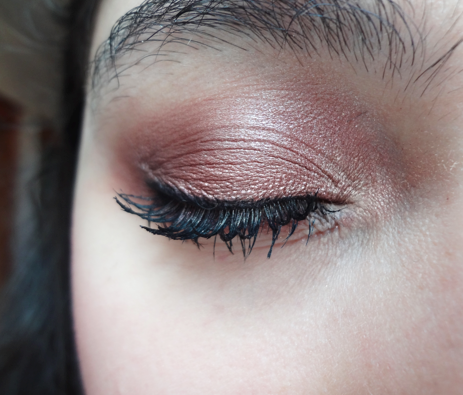
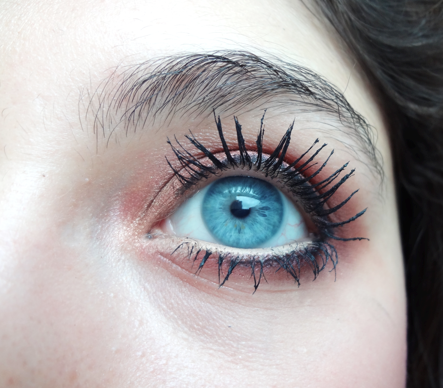
Of all of the aspects of makeups, eyeshadow is, without a doubt, the area where I get most creative and let my freak flag fly (exception: sometimes I rock the hell out of a bright lip). Given the absurdity of makeup that I have collected over the years, I actively make an effort to try and “shop my collection” and avoid falling into any sort of makeup rut. Of course, given limited time to get ready most mornings, I do have some go-to minimal makeup looks, usually consisting of eyeliner, mascara, a lip/cheek tint, and some powder to control oiliness throughout the day. Mondays can obviously be quite the downer. However, I was able to wake up naturally this Monday morning (meaning, without an alarm), and had the added luxury of plenty of getting-ready time. Obviously, I chose to take advantage of this extra time and play around with some adventurous eye makeup, and photograph it for your viewing pleasure. My introduction to eye makeup was completely through MAC shadows, primarily because that is all my mother had laying around to be stolen. Since then, I have expanded my collection to include some palettes from Urban Decay, NYX, Wet n' Wild, Smashbox, Stila, etc., while also slowly purchasing MAC single eyeshadows to fill in my customized palette (*see below). This Monday morning, I was inspired by the American Thankgivings spirit, comfy clothes in chilly weather, and comfort food. Cranberry was one of my most recent MAC shadow purchase, and had the honour of taking one of the final spots in my palette. We've all been told that red eyeshadow is very tricky to pull off, makes your eye look bruised, and is best avoided. Although Cranberry looks intimidating in the pan, it is actually an extremely workable shade, especially for those with blue eyes. (Red is the opposite of blue on the colour wheel, and therefore makes it appear more vibrant, though Cranberry can still look beautiful on any eye colour). The trick to pulling off Cranberry for an everyday makeup look is to use complimentary warm, neutral colours that balance out Cranberry's strong red tones. In order to ensure that my makeup would stay in place all day, I chose to use a cream shadow as an eye primer. For this look, I used Maybelline Eye Studio 24-hour colour tattoo cream gel eyeshadow in Pomegranate Punk, as the shade's rust colour provided the perfect base for my shadows to adhere to. Directly over top, I patted MAC eyeshadow in Cranberry all over the lid, using a flat shader brush, and blended it into the crease. Afterward, I applied a light dusting of MAC eyeshadow in Woodwinked (a copper-toned gold) on top of Cranberry, and blended them together, adding a bit more of Cranberry in the crease for depth and definition. Finally, I used a small dome brush to apply MAC eyeshadow in Club (a brown-ish deep green with red duochrome) in the outer corner of my lid, and continued blending until I reached the desired effect. I also applied some of Club under the lid, using a small angled brush. I then lined my eyes with L'Oreal Infallible eyeliner in Carbon Black, and set it by dipping my angled brush into Urban Decay Blackout eyeshadow (from the Naked2 palette). In order to look a bit more awake, and prevent any "bruised eye" looks, I applied the Rimmel Scandaleyes Kohl Kajal liner in Nude to my waterline (not pictured above, sorry). Applying a white, nude, or light pink to your waterline is an amazing way to make your eyes appear bigger and brighter, as it emphasizes the whites of your eyes. Obviously, I finished off the look with my faithful Maybelline the Rocket Volum' Express Mascara in Blackest Black, which brought the whole look to life. 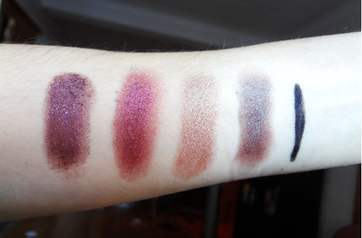 From left to right: Maybelline Colour Tattoo in Pomegranate Punk; MAC Cranberry; MAC Woodwinked; MAC Club; L'Oreal Infallible Eyeliner in Carbon Black And alas, below is the final product on my eyes. Note: Please ignore the severe under eye bags/dryness in these photos, as I was still very sleep-deprived, and my dark circles are chronically regardless. Also, I am aware that I have neglected to get my eyebrows waxed all semester, and plan to fix this eventually... In the end, I was very pleased with how this Cranberry look turned out, and I think it's a perfect way to change things up makeup-wise this time of year. As you can see: the warm, red tones lend beautifully to blue eyes. I was wearing this to school and the eyes were pretty dramatic, so I kept the rest of the fact pretty minimal: NARS Laguna bronzer, some Hard Candy Glamouflage concealer, a bit of Benetint just to give my lips some colour, and my Maybelline FIT Me Powder to bring it all together.
All too often, we buy super fun eyeshadows, blushes, or lip colours that we write off as "too much" for everyday wear, or that we're saving for "special occasions." Instead, I want to encourage everyone to take some risks, enjoy your makeup collection, and most importantly, wear it with confidence! After all, life's short, and it's a lot more fun when you take some creative freedom. And a very happy earlier thanksgiving to the Americans :)
As a beauty junkie, I too frequently buy into the latest claims, crazes, innovations and trends that arise with every season. That being said, there are certain items that I find myself repurchasing again and again, either because they are a necessity, or because I have yet to find a better replacement. Today, I will be sharing of few of these good ol' faithful beauty products that 1. Cotton Pads: You can rest assured that I will always buy another bag of these when I run out. Cotton pads, or "makeup removing pads," as these one are called, are amazing for applying toner to your face, and more gently removing stubborn black makeup under your eyes. However, I am not brand loyal to any particular brand/type of cotton pads, and usually buy whatever is cheapest/around when I run out. 2. Revlon Colorstay Base + Top Coat: Given how much I have grown to obsess over makeup, it is hard to believe that I used to not wear any (except the occasional mascara) or know anything about the entire realm until my senior year of high school. My first forray into extreme superficial girly-ness was with my obsessive nail polish hoarding around the tenth grade. Since 2008, I have barely spent a day with bare fingernails. However, I pride myself in the fact that my nails are still in good health, have no discoloration, and are usually chip-free. I have also tried out my fair share of base/top coats including Seche Clear + Seche Vite, OPI Ridge Filler, Sally Hansen Insta-Dry, Sally Hansen Diamond Strength, etc. After a long love affair with Seche, I have found my new holy grails, and that would be these gems my Revlon. They're easily accessible, relatively cheap, the colour lasts, my nails dry fast, and the finish is always super-glossy. I would highly recommend these to everyone, and also encourage you to check out the rest of the Revlon Colorstay nail line. 3. Hydraluron by indeed labs: Sometimes, you just gotta follow the pack, if just for investigative purposes (to see if a product can truly be as miraculous as it is made out to be). For those who have never heard of this product before, let me provide a brief synopsis: Hyaluronic acid (or sodium hyaluronate) is by no means a new skincare breakthrough or discovery. In fact, it has probably been somewhere in the ingredients list of several moisturizing products you've owned as it "can hold up to 1,000 times its weight in water" (whatever that means). However, hyaluronic acid is having a huge comeback, and indeedlabs is capitalizing on it by providing a no-frills, moderately priced, fragrance-free, and paraben-free "moisture booster" serum. A bit over a year ago, internet skin care guru Caroline Hirons sung her praises for hydraluron, and since then, almost every beauty blogger has also joined the fan club. Although the tube is little in size, it lasted me several months of near daily use. So is hydraluron worth the hype? To be honest, not really. I have not noticed some fabulous breakthrough in my skin while using this product, nor do I notice a grand difference on days that I go without it. Granted, this may be because my skin wasn't really all that dry or dehydrated to begin with (I just sort of assumed that the extra hydration couldn't hurt). Regardless, I still chose to repurchase it before I ran out, because (a) it is still well-priced when compared to other serums, (b) I actually got it on sale so that was tempting, (c) hyaluronic acid is a skin-identical ingredient proven to boost moisture content and prevent moisture loss *( source). For now, this will remain an ol' faithful serum under the yet to find a better replacement category.
|


 RSS Feed